[Haifeng Process Standards Quick Reference]
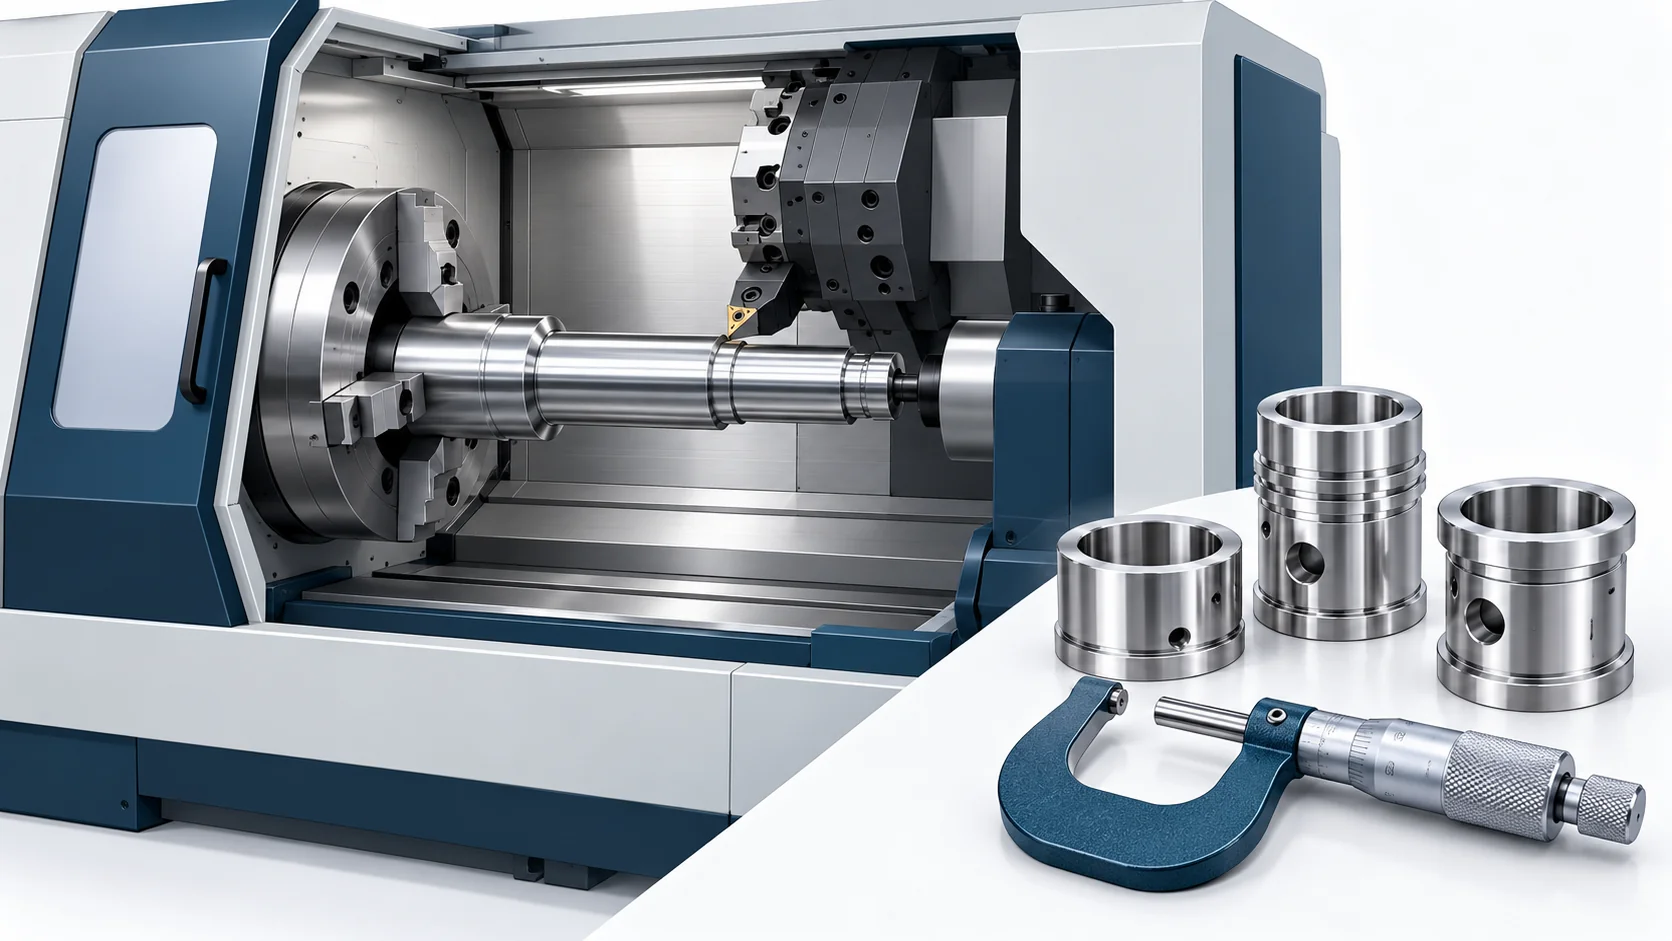
The metering accuracy of Haifeng polyurethane equipment depends heavily on the CNC turning accuracy of critical rotating components. Every 0.005 mm deviation in the metering-pump plunger journal tolerance can reduce clearance uniformity between the plunger and cylinder sleeve by more than 20%, causing metered-flow fluctuation above 1.5% and degrading ratio accuracy from ±0.3% to more than ±0.5%. Clearance between the mixing-head valve core and sleeve must be 0.005–0.015 mm, and sealing-surface roughness must be Ra ≤0.2 μm; otherwise, internal leakage during switching can upset the raw-material ratio.
Key process parameters at a glance:
| Parameter | Haifeng standard | Industry reference | Related indicator |
| CNC lathe positioning accuracy | ≤±0.008 mm | ≤±0.015 mm | Metering ratio accuracy ±0.3% (ISO 8060) |
| Repeat positioning accuracy | ≤±0.003 mm | ≤±0.005 mm | Batch-part consistency CV ≤0.5% |
| Spindle radial runout | ≤0.002 mm | ≤0.003 mm | OD roundness ≤0.003 mm |
| Spindle axial movement | ≤0.002 mm | ≤0.005 mm | Face flatness ≤0.005 mm |
| Spindle-face circular runout | ≤0.002 mm | ≤0.003 mm | Flange locating-face accuracy |
| Reversal backlash | ≤0.002 mm | ≤0.005 mm | Contour accuracy |
| Metering-pump plunger-journal tolerance | IT5–IT6 | IT6–IT7 | Clearance uniformity CV ≤10% |
| Valve-core mating roughness | Ra ≤0.2 μm | Ra ≤0.4 μm | Switching ≤0.3 s; no internal leakage |
| Plunger mating roughness | Ra ≤0.4 μm | Ra ≤0.8 μm | Volumetric efficiency ≥95% |
| Seal-groove bottom roughness | Ra ≤0.8 μm | Ra ≤1.6 μm | Seal life ≥100,000 shots |
| Shaft roundness | ≤0.003 mm | ≤0.005 mm | Smooth plunger/valve-core motion |
| Shaft cylindricity | ≤0.005 mm/100 mm | ≤0.01 mm/100 mm | Uniform clearance along mating length |
| 316L cutting speed | 120–180 m/min | 120–180 m/min | Tool life ≥60 min |
| Aluminum-alloy cutting speed | 300–800 m/min | 300–800 m/min | Dimensional accuracy IT6–IT7 |
| Pipeline-fitting thread accuracy | 6H/6g | 6H/6g | No leakage at 0.02 MPa |
| Machining ambient temperature | 20±2°C | 20±5°C | Thermal error ≤5 μm |
| In-machine probe repeatability | ≤0.002 mm | ≤0.005 mm | Machining-inspection closed loop |
1. Scope
1.1 Applicable operations
This SOP applies to CNC turning of these precision rotating parts for Haifeng polyurethane equipment:
| Part | Typical material | Key accuracy requirement | Related equipment indicator |
| Metering-pump plunger/journal | Alloy tool steel/9Cr18MoV | IT5–IT6; Ra ≤0.4 μm | Efficiency ≥95%; metering accuracy ±0.3% |
| Metering-pump gear shaft | Alloy tool steel | IT6; coaxiality ≤0.005 mm | Gear meshing and smooth transmission |
| Mixing-head valve core | 17-4PH/316L | Mating Ra ≤0.2 μm; cylindricity ≤0.003 mm | Switching ≤0.3 s; no internal leakage |
| Mixing-head valve sleeve | 17-4PH/316L | Bore IT6; Ra ≤0.2 μm | Core/sleeve clearance 0.005–0.015 mm |
| Servo-motor flange | 6061/7075 aluminum | Face flatness ≤0.01 mm; register IT6 | Coupling alignment ≤0.03 mm |
| Ball-screw support | Alloy steel | Bearing bore IT6; coaxiality ≤0.01 mm | Screw axial movement ≤0.005 mm |
| Material-transfer fitting | 316L | Thread 6H/6g; sealing-face Ra ≤0.8 μm | No leakage at 0.02 MPa |
| Seal groove | 316L/alloy steel | Bottom Ra ≤0.8 μm; width ±0.02 mm | Specified seal life |
| Pouring-platform drive shaft | Alloy steel | Journal IT6; roundness ≤0.003 mm | Path repeatability ±0.05 mm |
2. Pre-Job Preparation and Machine Accuracy Verification
2.1 Review technical documents
| No. | Item | Requirement | Acceptance criterion |
| 1 | Turning program | Matches latest drawing | Revision matches process card |
| 2 | Tool list | Model, geometry, life record | Runout measured and recorded |
| 3 | Fixture drawing | Datums and clamping plan | Locating accuracy ≤0.005 mm |
| 4 | Inspection plan | Critical dimensions, tolerances, tools | ISO 2768-1 or drawing requirements |
| 5 | Material certificate | Grade matches drawing | Hardness and composition reports included |
2.2 Verify machine accuracy
Calibrate the CNC lathe regularly under its calibration procedure. Calibration error for critical parameters must be ≤0.003 mm.
| Calibration item | Haifeng standard | Interval | Tool |
| Spindle radial runout | ≤0.002 mm | Quarterly | Dial indicator and master mandrel |
| Spindle axial movement | ≤0.002 mm | Quarterly | Dial indicator |
| Spindle-face circular runout | ≤0.002 mm | Quarterly | Dial indicator |
| X/Z positioning accuracy | ≤±0.008 mm | Quarterly | Laser interferometer |
| X/Z repeat positioning | ≤±0.003 mm | Quarterly | Laser interferometer |
| Reversal backlash | ≤0.002 mm | Quarterly | Laser interferometer |
| Bed-guideway straightness | ≤0.01 mm/1000 mm | Every 6 months | Precision level/collimator |
| Turret repeat positioning | ≤±0.005 mm | Monthly | Dial indicator |
| Chuck centering | ≤0.01 mm | Monthly | Master mandrel and dial indicator |
2.3 Verify tool accuracy
Tool geometry directly affects dimensional accuracy and surface quality. Common CNC-lathe tools include OD turning tools, boring bars, grooving tools, and threading tools. Main cutting-edge radial circular runout must be ≤0.01 mm.
| Tool type | Runout limit | Inspection tool | Frequency |
| OD finishing tool | ≤0.005 mm | Dial indicator on V-block | Before loading each batch |
| Boring bar | ≤0.008 mm | Dial indicator/master ring gauge | Every tool change |
| Grooving tool | ≤0.01 mm | Dial indicator | Every tool change |
| Threading tool | ≤0.01 mm | Dial indicator/angle gauge | Every tool change |
| Form tool | ≤0.005 mm | Profile projector/toolmaker’s microscope | Every loading |
| Tool-tip height after insert installation | ±0.05 mm relative to spindle center | Height gauge/tool presetter | Every tool change |
3. Structured CNC Turning Workflow
3.1 Pre-shift preparation and warm-up
3.1.1 Confirm machine status
Switch on the main power, then start the machine and CNC system. After the self-check completes without alarms, home each axis. The recommended sequence is X, then Z, to establish the machine coordinate system. After homing, warm up unloaded at low speed so spindle-bearing and guideway lubricant films distribute evenly and thermal deformation has less effect on accuracy.
Minimum warm-up times:
| Part accuracy | Warm-up | Method |
| General (below IT7) | ≥10 min | Spindle at medium speed unloaded; reciprocate all axes |
| Precision (IT6–IT7) | ≥20 min | Spindle at medium/high speed unloaded; traverse all axes |
| High accuracy (IT5–IT6) | ≥30 min | Spindle unloaded at machining speed; repeatedly traverse all axes |
| Ultra-precision (IT5 or tighter) | ≥45 min | Simulate machining and monitor thermal equilibrium |
Thermal displacement accounts for approximately 40%–70% of machine-tool machining error. Lathe thermal displacement has an initial transient phase (the first three hours) and a later steady-state phase (after three hours); accuracy changes more sharply during the first phase.
3.1.2 Check coolant and lubrication systems
Check coolant level and concentration: use 8%–12% emulsion for stainless steel and 5%–8% for aluminum alloy. Check guideway lubricant and confirm the automatic lubrication system works. For precision machining, keep coolant at 20±2°C.
3.2 Clamp the workpiece and establish datums
3.2.1 Control clamping accuracy
Secure clamping directly affects machining safety and accuracy. Before clamping, clean chuck jaws and workpiece locating surfaces and remove burrs and oil.
| Clamping method | Suitable part | Locating accuracy | Notes |
| Three-jaw self-centering chuck | Small/medium shafts | ≤0.02 mm | Finish-bore soft jaws to restore centering |
| Collet chuck | Precision small shafts/valve cores | ≤0.005 mm | Collet bore must match workpiece OD |
| Precision hydraulic chuck | Precision sleeves/flanges | ≤0.005 mm | Adjust force to avoid thin-wall distortion |
| Between centers with drive plate | Slim shafts/lead screws | ≤0.005 mm | Finish-grind center holes; coaxiality ≤0.002 mm |
| Dedicated mandrel fixture | Thin-wall sleeves/valve sleeves | ≤0.003 mm | Mandrel-to-bore clearance ≤0.005 mm |
3.2.2 Control tool-setting accuracy
Tool setting links the program coordinate system to the physical workpiece. Set each tool independently and enter its compensation value. Haifeng requires accuracy within ±0.003 mm. For critical parts such as metering-pump plungers and mixing-head valve cores, use a high-accuracy presetter or in-machine probe.
Select a tool-setting method:
| Method | Accuracy | Application |
| Manual trial cut | ±0.01 mm | General-accuracy parts |
| Optical presetter | ±0.005 mm | Precision parts |
| Automatic presetter | ±0.003 mm | High-accuracy parts |
| In-machine probe | ±0.002 mm | IT5–IT6 precision parts |
3.3 Validate the program and cut the first article
3.3.1 Program simulation and dry run
Before automatic machining, use CNC graphical simulation or Dry Run mode to check for abnormal tool retraction, undefined axis movement, or possible collision with the chuck. Verify that the G codes at the beginning and end of the program (such as G90/G91 and G96/G97) match the intended operation.
3.3.2 First-article trial cut
Apply a “verify at low speed” approach to the first trial cut. Set feed override below 50% and enable Single Block mode. After machining the first feature (such as a face or OD), pause and measure critical dimensions with a micrometer or suitable gauge. Fine-tune tool compensation or work-coordinate offset if needed. Resume continuous machining at 100% override only after the part passes inspection.
3.4 Cutting parameters and accuracy control
3.4.1 Material groups and cutting parameters
CNC turning for Haifeng equipment mainly involves alloy tool steel, stainless steel (304/316L), aluminum alloy (6061/7075), and 17-4PH precipitation-hardening stainless steel.
Recommended turning parameters for 316L stainless steel (coated carbide tools):
| Operation | Cutting speed Vc (m/min) | Feed f (mm/rev) | Depth of cut ap (mm) | Tool nose radius rε (mm) |
| Roughing | 120–150 | 0.20–0.35 | 1.5–3.0 | 0.8–1.2 |
| Semi-finishing | 150–180 | 0.10–0.20 | 0.5–1.5 | 0.8 |
| Finishing | 160–180 | 0.05–0.12 | 0.1–0.5 | 0.4–0.8 |
For stainless steel such as 316L, use 120–180 m/min to control heat and extend tool-coating life. Proper speed control lowers the risk of premature tool fracture from work hardening. Since molybdenum makes 316L more prone to work hardening than 304, use a high-feed, moderate-depth-of-cut strategy and avoid repeatedly cutting a hardened layer.
Recommended turning parameters for aluminum alloy (6061-T6/7075):
| Operation | Cutting speed Vc (m/min) | Feed f (mm/rev) | Depth of cut ap (mm) | Tool nose radius rε (mm) |
| Roughing | 300–500 | 0.25–0.45 | 1.5–4.0 | 0.8–1.2 |
| Finishing | 500–800 | 0.05–0.15 | 0.2–0.5 | 0.4–0.8 |
The recommended cutting speed for aluminum alloy such as 6061-T6 is 300–800 m/min. With high-pressure coolant, speed can exceed 1000 m/min. An appropriate high speed can significantly reduce cycle time per part.
3.4.2 Relationship between surface roughness and feed
Feed rate directly controls surface-texture height. The theoretical roughness relationship is approximately:
Rz ≈ (f² ÷ 8rε) × 1000 (μm)
Where f = feed (mm/rev) and rε = tool nose radius (mm).
Recommended parameters by roughness requirement:
| Target roughness | Tool nose radius rε (mm) | Recommended feed f (mm/rev) | Typical part |
| Ra ≤0.2 μm | 0.4 | 0.03–0.06 | Mixing-head valve-core mating face |
| Ra ≤0.4 μm | 0.4–0.8 | 0.05–0.10 | Metering-pump plunger mating face |
| Ra ≤0.8 μm | 0.8 | 0.08–0.15 | Seal-groove bottom |
| Ra ≤1.6 μm | 0.8–1.2 | 0.15–0.25 | General mating face |
3.4.3 Control and compensate for thermal deformation
Thermal-deformation error is a key factor affecting CNC lathe accuracy. Apply these controls:
1. Warm up: Run the spindle unloaded at machining speed for 20–45 minutes so bearings and ball screws reach thermal equilibrium.
2. Control coolant: Maintain cutting-fluid temperature at 20±2°C to prevent heat from expanding the workpiece and tool.
3. Online compensation: Enable thermal-error compensation during long continuous operations. Systematic thermal management can reduce temperature-related machining error by more than 60%. Turning validation has shown error reductions above 75% across repeated machining and cold-start conditions.
4. Ambient temperature: Maintain the precision-machining area at 20±2°C.
3.4.4 Monitor tool wear
| Item monitored | Normal condition | Warning threshold | Response |
| Spindle load | Stable, no sharp fluctuation | Fluctuation >10% | Check tool/workpiece condition |
| Cutting sound | Even swishing sound | Shrill squeal or dull impact | Stop and check for chipped edges |
| Surface-roughness trend | Within standard | Ra increase >20% | Replace tool or adjust parameters |
| Chip shape | Regular spiral or C-shaped | Powder-like or long tangled chips | Adjust feed/speed |
| Dimensional trend | Near tolerance midpoint | One-way drift >0.005 mm | Check tool wear or thermal deformation |
3.5 In-machine inspection and closed-loop machining
For IT5–IT6 precision parts such as metering-pump plungers and mixing-head valve cores, use in-machine inspection for a machining-inspection closed loop. One-way probe repeatability must be ≤0.002 mm.
Procedure:
1. After semi-finishing, call the in-machine inspection program.
2. The probe automatically contacts key points (OD, bore, face, groove dimensions, etc.).
3. The system compares measurements with tolerance requirements.
4. If deviation exceeds the warning range, the system automatically corrects tool compensation.
5. Finish the part after correction and confirm final dimensions pass.
4. Key Parameters for CNC Turning Accuracy
| No. | Category | Parameter | Haifeng standard | Inspection tool | Frequency |
| 1 | Machine | X/Z positioning accuracy | ≤±0.008 mm | Laser interferometer | Quarterly |
| 2 | Machine | X/Z repeat positioning | ≤±0.003 mm | Laser interferometer | Quarterly |
| 3 | Machine | Reversal backlash | ≤0.002 mm | Laser interferometer | Quarterly |
| 4 | Machine | Spindle radial runout | ≤0.002 mm | Dial indicator/master mandrel | Quarterly |
| 5 | Machine | Spindle axial movement | ≤0.002 mm | Dial indicator | Quarterly |
| 6 | Tool | OD finishing-tool runout | ≤0.005 mm | Dial indicator | Each batch loading |
| 7 | Tool | Boring-bar runout | ≤0.008 mm | Dial indicator/master ring gauge | Each tool change |
| 8 | Machining | Plunger-journal tolerance | IT5–IT6 | CMM/micrometer | First article + sampling |
| 9 | Machining | Valve-sleeve bore tolerance | IT6 | CMM/inside micrometer | First article + sampling |
| 10 | Machining | Shaft roundness | ≤0.003 mm | Roundness tester | First article + sampling |
| 11 | Machining | Shaft cylindricity | ≤0.005 mm/100 mm | CMM | First article + sampling |
| 12 | Machining | Stepped-shaft coaxiality | ≤0.005 mm | CMM | First article + sampling |
| 13 | Surface | Valve-core mating roughness | Ra ≤0.2 μm | Roughness tester | 100% inspection |
| 14 | Surface | Plunger mating roughness | Ra ≤0.4 μm | Roughness tester | 100% inspection |
| 15 | Surface | Seal-groove bottom roughness | Ra ≤0.8 μm | Roughness tester | Sampling |
| 16 | Critical fit | Plunger-to-sleeve clearance | 0.005–0.015 mm | Pneumatic gauge | 100% inspection |
| 17 | Critical fit | Valve-core-to-sleeve clearance | 0.005–0.015 mm | Pneumatic gauge | 100% inspection |
| 18 | Thread | Pipeline-fitting thread | 6H/6g | Thread ring/plug gauge | First article + sampling |
| 19 | Environment | Machining temperature | 20±2°C | Temperature/humidity logger | Continuous |
| 20 | In-machine inspection | One-way probe repeatability | ≤0.002 mm | Master-ball calibration | Each shift |
5. Common Problems and Process Pitfalls
5.1 Thermal deformation causes precision-part dimensional drift
Symptom: Parts that pass in the morning show a systematic OD increase in the afternoon (typically 0.005–0.02 mm), or dimensions drift during continuous machining. Chatter or waviness appears on the turned surface, and finish is out of specification.
Root cause: Cutting and friction heat expand the lathe spindle, ball screws, and workpiece. Thermal displacement accounts for approximately 40%–70% of machine-tool error. Lathe thermal displacement has an initial transient phase (first three hours) and a steady-state phase (after three hours); accuracy changes more sharply during the first phase. Spindle axial growth can reach 0.01–0.03 mm, and ball-screw growth can reach 0.02–0.05 mm over a 1 m travel. For Haifeng parts with tolerances of only ±0.005 mm, thermal deformation is a primary cause of batch accuracy drift.
Corrective actions:
1. Warm up the spindle unloaded at machining speed for 20–45 minutes; start only after thermal equilibrium.
2. Enable thermal-error compensation during long continuous runs; systematic thermal management can reduce temperature-related error by more than 60%.
3. Schedule finishing during the stable period after the machine reaches thermal equilibrium.
4. Use a staged process for precision parts: rough machining, natural cooling, then finish machining.
5.2 Tool wear causes gradual dimensional drift
Symptom: Batch OD dimensions drift in one direction from the tolerance midpoint toward an upper or lower limit, and CV increases.
Root cause: Flank wear reduces actual depth of cut (making an OD too large or a bore too small). As the edge dulls, cutting resistance increases and dimensional deviation becomes more likely. For IT5–IT6 precision parts, every 0.01 mm increase in flank wear can cause a dimensional deviation of about 0.005–0.01 mm.
Corrective actions:
1. Maintain a tool-life log and set replacement intervals by material and cutting parameters.
2. Sample-check critical dimensions every 10–20 parts; adjust tool compensation immediately if one-way drift appears.
3. Use a new or properly reground cutting edge for precision finishing; do not use a tool that has already performed roughing.
4. For 316L, use TiAlN- or AlTiN-coated carbide tools to improve resistance to crater wear.
5.3 Slim shafts bend during machining
Symptom: When turning a shaft with length-to-diameter ratio above 25, the center bends, cylindricity and straightness fall out of tolerance, and chatter marks appear.
Root cause: Slim shafts have low rigidity and are prone to chatter and deformation. Radial cutting force pushes the workpiece away from the tool, reduces actual depth of cut, and makes the middle diameter too large, producing a “barrel” shape. A follower rest helps resist radial and vertical cutting forces.
Corrective actions:
1. Support the workpiece with a follower rest; fit its fingers precisely to the finished surface.
2. Use reverse turning (feed from chuck toward tailstock) so the workpiece is under axial tension rather than compression.
3. Select a tool with a 93° entering angle to generate greater axial force and lower radial force, reducing shaft deflection.
4. Use progressively lighter cuts; reduce depth gradually after roughing to release residual stress.
5. For ultra-slim shafts (L/D >50), consider ultrasonic-vibration-assisted cutting.
5.4 Excessive sealing-surface roughness causes internal leakage
Symptom: Mixing-head valve-core/sleeve mating surfaces exceed Ra 0.2 μm; internal leakage during switching disrupts the raw-material ratio.
Root cause: Feed is too high or the tool nose radius is unsuitable. Roughness increases with the square of feed and decreases as nose radius increases. If finishing feed exceeds 0.10 mm/rev or nose radius is below 0.4 mm, Ra ≤0.2 μm is difficult to achieve. Worn edges or machine vibration also worsen roughness.
Corrective actions:
1. Keep finishing feed at 0.03–0.06 mm/rev and use a 0.4 mm tool nose radius.
2. Use a wiper insert to achieve better finish at higher feed.
3. If needed, add a lapping operation; lapping can reduce roughness to Ra ≤0.1 μm.
4. Inspect 100% of sealing surfaces after turning with a surface-roughness tester; nonconforming parts must not proceed.
5.5 Insufficient thread accuracy causes pipeline leakage
Symptom: Pipeline-fitting threads are too loose or tight, and the assembly fails the airtightness test (leakage at 0.02 MPa for 30 minutes).
Root cause: Thread angle, pitch, or pitch diameter is out of tolerance. Accuracy depends on machine condition, tool geometry, program accuracy, cutting parameters, material properties, and tool wear. For sealing threads, every 0.02 mm excess pitch-diameter deviation reduces contact area by about 15%, lowering sealing reliability.
Corrective actions:
1. Set the threading-tool tip slightly above workpiece center by 1% of the diameter to prevent digging in.
2. Select G32 straight infeed for high accuracy or G76 angled infeed for roughing, as appropriate.
3. Check every thread with a thread ring/plug gauge and confirm 6H/6g accuracy.
4. For sealing threads, perform both GO and NO-GO gauge checks.
5.6 Clamping deformation puts thin-wall sleeves out of round
Symptom: Thin-wall parts such as mixing-head valve sleeves become oval or out of tolerance after machining and spring back when unclamped.
Root cause: Excessive clamping force or poorly distributed clamping points elastically deform the part while held. The tool cuts material from this deformed state; springback after unclamping shifts actual dimensions. Thinner sleeve walls are more susceptible.
Corrective actions:
1. Use a precision hydraulic chuck instead of a three-jaw chuck; its force can be adjusted and distributed evenly.
2. Use axial clamping with auxiliary radial support to avoid concentrated radial force.
3. After roughing, release the fixture and allow the part to cool naturally; then finish with lower clamping force.
4. For high-accuracy thin-wall sleeves, use a dedicated mandrel fixture with mandrel-to-bore clearance ≤0.005 mm.
5. Reduce finishing feed as appropriate (0.03–0.08 mm/rev) to limit cutting-force deformation.