Most mold release failures do not start with the release agent. They start with a mold surface that is hotter or colder than the product expects, a film that is thick in some areas and absent in others, or a pour cycle that begins before the carrier has flashed off. In polyurethane molding, the release layer is a process boundary, not a coating. Its job is to keep the reacting liquid from locking into the mold surface long enough for the part to be pulled or ejected without tearing.
Why Mold Release Fails Before the First Shot
When a polyurethane system contacts a clean mold, it can form two types of attachment: mechanical interlocks into micro-roughness and chemical interaction through residual isocyanate reactivity. An external mold release agent limits both by creating a low-surface-energy film between the mold and the reacting liquid [1]. If that film is discontinuous, adhesion forms in the gaps. Once adhesion begins in one zone, demolding force rises across the whole part because the part must shear away from an uneven hold pattern rather than separate cleanly.
A common misunderstanding is to keep adding more release agent when the part sticks. More release agent does not fix a disrupted film. It can make the film thicker, transfer to the part surface, and build up in vents, ribs, and undercuts. In many cases the correct response is to clean the mold, restore the surface temperature, and reapply a thin, even layer.
The Application Variables That Matter More Than Chemistry
Release agent selection matters, but four application variables usually determine whether the selected product works:
- Mold surface temperature. Water-based release agents must flash off the carrier before the polyurethane pour begins. If the mold is too cold, the water or solvent remains under the forming part and can become a surface void. If the mold is too hot, the carrier can boil off before the release solids level out.
- Film thickness and coverage. A release film must be continuous but not heavy. Heavy films transfer to the part, create dull spots, and accumulate in mold details. Thin spots or skipped edges expose the mold surface and create local sticking.
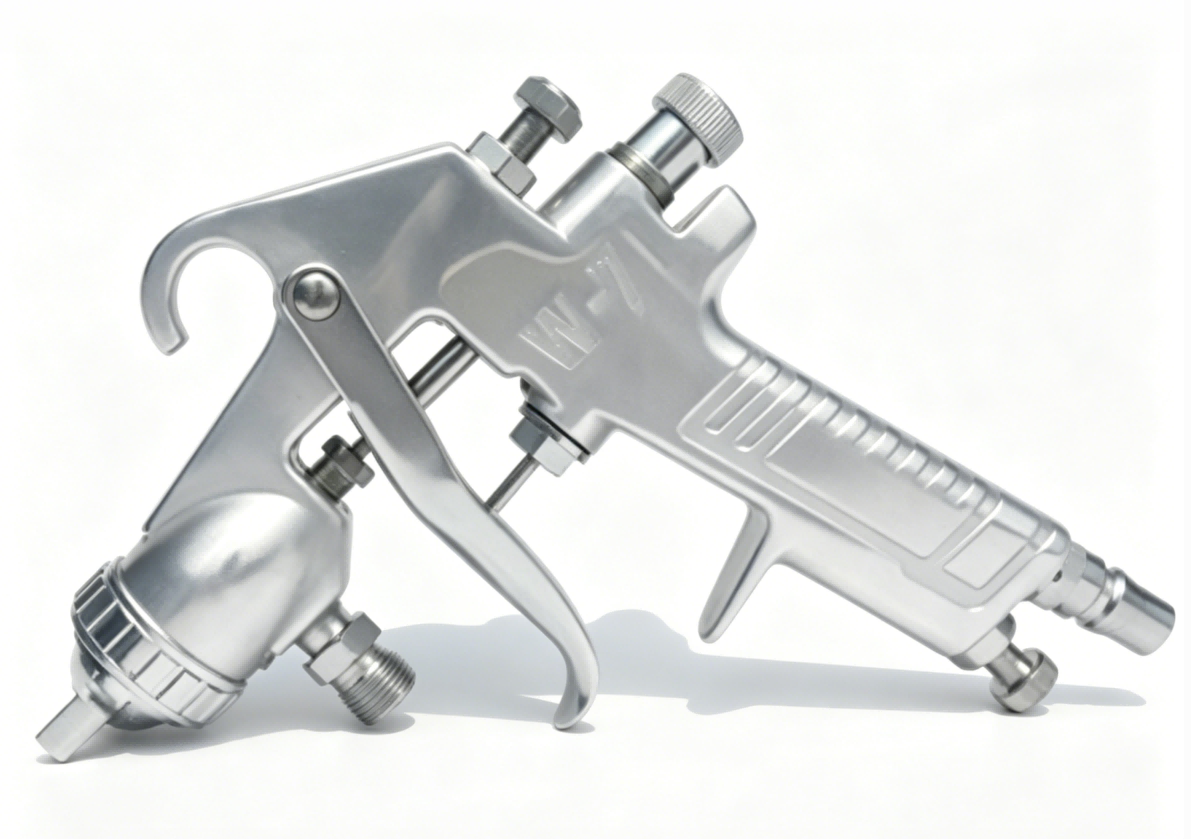
- Spray pattern. A focused spray cone deposits too much material in the center and too little at the edges. This is a common reason a part sticks in one corner while the rest of the mold releases.
- Drying time. Pouring before the carrier has flashed off traps solvent or water at the mold-part interface. The gas release disrupts the skin and appears as pinholes or a fine frosted pattern on the part.
| Variable | When it drifts | On-part symptom | Corrective action |
|---|---|---|---|
| Mold temperature | Too low for the release product | Pinholes, wet-looking skin | Raise to the product’s recommended window |
| Mold temperature | Too high | Dry film flashes off unevenly | Lower to the recommended window |
| Film thickness | Too high | Dull finish, buildup | Reduce spray time or move gun farther away |
| Film thickness | Too low | Corner/edge sticking | Check gun coverage maps and reapply |
| Drying time | Too short | Pinholes, trapped carrier | Extend flash-off before each pour |
Hardness and surface skin influence how a part releases from the mold. Shore A Vs Shore D Hardness In Polyurethane covers how the two scales are measured and why part hardness matters in demolding.
Matching the Release Product to the Polyurethane System
The right release agent class depends on the molding process, the part surface requirement, and the plant’s tolerance for solvent or post-molding cleaning:
- Solvent-based external release agents flash off quickly and tolerate a wider mold-temperature range, but they add VOC load and require ventilation.
- Water-based external release agents reduce solvent handling but are more sensitive to mold temperature and surface cleanliness.
- Semipermanent release systems stay on the mold for multiple cycles. They reduce application frequency, but they demand a clean base surface and disciplined reapplication intervals.
- Internal mold release agents are formulated into the polyurethane system rather than sprayed on the mold. They lower external release demand, but they can change paint adhesion, bonding, and part surface behavior [2].
For open-cast polyurethane elastomers and microcellular parts with no internal release agent, external film application is usually required every cycle. For high-output molded lines, semisystems or IMR formulations can cut cycle time, but only after the formulation and mold surface are stable.
The Application Checklist That Prevents Most Demolding Problems
1. Clean the Mold Before Rebuilding the Release Film
A release film should not be applied over old release residue, mold grease, rust bloom, or oxidized material. Use a mold cleaner that removes the previous release chemistry, then wipe with a clean lint-free cloth. Do not sand or polish the mold surface between cycles as a release fix; changing surface finish changes release and can create a zone that behaves differently from the rest of the cavity.
2. Reapply the Film in Thin, Even Coats
Most release products perform best as two light passes rather than one heavy pass. The first pass wets the mold; the second fills thin areas after a short flash. Keep the spray gun moving in overlapping strokes and avoid dwelling on corners and ribs, where film builds up quickly.
3. Dry the Film Before Each Cycle
Allow the carrier to flash off completely before pouring. A damp or solvent-heavy film becomes a gas source at the part surface. If the plant has variable air movement, use a fixed drying interval rather than judging dryness visually.
4. Verify Coverage in High-Risk Areas
Deep draw, undercut, gate, and vent features are where release film is most likely to be too thin or too heavy. A quick visual check under angled light after each application is enough to catch skipped zones before the first bad shot.
5. Monitor Transfer and Buildup at Intervals
At the end of a shift or after a set cycle count, inspect the part for release film transfer and inspect the mold for white or waxy buildup. A controlled amount of buildup is normal, but an increasing trend means the film is being applied too heavily.
Troubleshooting Common Release-Related Defects
Sticking and Heavy Demolding Force
Sticking is usually local before it is global. The part pulls free from most of the mold but hangs at a corner, vent, or undercut. Check the film in that zone first, then check mold temperature uniformity. A cold spot can condense moisture or cool the release film enough to change its behavior. If the sticking zone is consistent across shots, the issue is not operator spray variation; it is the mold, the release product, or the part design.
Sticking can also follow a part that shrinks differently than expected, which increases holding force in a closed cavity. Causes Of Shrinkage In Polyurethane Foam How To Control It covers the causes and controls.
Pinholes and Surface Voids
Pinholes at the part surface can come from wet release film, excess carrier, or air trapped during mold fill. If pinholes are aligned with spray direction, release film is likely too wet or too heavy. If pinholes appear only on the last-filled area, shot weight and venting need review before changing the release product.
Dull or Non-Uniform Surface Finish
Heavy release film transfers to the part and changes gloss, especially on smooth mold surfaces. If the part becomes dull in the same area every shot, reduce the spray duration or adjust the gun distance in that zone. If the dullness moves from shot to shot, the spray pattern is drifting or the release product is not mixing well.
Release Agent Buildup in Vent and Undercut Areas
Buildup narrows vents and changes cavity fill pressure. It can create short shots and increased demolding force at the same time. Clean these areas on a schedule rather than waiting for a defect. For parts with many vents, use a release product that leaves a thinner, semidry film and reapply at shorter intervals.

When the Right Release Product Still Is Not Enough
If the release agent class, mold temperature, and spray pattern have been checked and the part still sticks or shows pinholes, the cause is usually not a shortage of release agent. It is a mismatch in shot weight, mix ratio, or demold time. Adding more release agent can mask the failure for a short run and then make it worse by transferring film to the part.
For a release or surface-defect review, send the part name, release agent product, mold temperature, cycle time, and a clear defect photo to Info@chinahaifeng.com or WhatsApp +86 13566296633. A brief note on the current spray method is enough to start a practical conversation.
Shot weight errors change how much material enters the mold, which changes part density, surface skin, and demolding force. How To Calculate Shot Weight In Polyurethane covers the calculation method.
Get a Release-Defect Review for Your Polyurethane Line
If a release or surface defect is limiting your output, describe the molded part, release product, mold temperature, cycle time, and the exact defect mode. Send defect photos or a short video to Info@chinahaifeng.com or WhatsApp +86 13566296633. The most useful inquiry is one that includes the current spray method and the number of shots between reapplication, because those details narrow the cause faster than a general description of the part.
Frequently Asked Questions
How often should mold release agent be reapplied?
Reapply according to the release product’s cycle claim, but treat that as a starting point, not a fixed rule. On open-cast polyurethane elastomers with no internal release agent, a fresh external film is usually required every cycle. Semipermanent mold release systems may last several cycles, but the interval depends on mold geometry, part surface, and residue control.
Can a mold release agent cause pinholes?
Yes. When the carrier has not flashed off before the pour, or when the film is too heavy, the trapped solvent or water becomes a gas source at the part surface. Pinholes from release application tend to follow the spray pattern.
Should I use a solvent-based or water-based release agent?
It depends on plant ventilation, mold temperature, part surface requirements, and local VOC regulation. Solvent-based products are often more forgiving on cooler or unevenly heated molds. Water-based products reduce solvent handling but demand tighter control of mold temperature and drying time.
Why does the part release at the start of a shift but stick later?
The most common reason is heat or buildup. As the mold heats or cools through the shift, the release film may flash off differently. Release residue can also accumulate over hours and change the surface. Record mold surface temperature at a fixed point after each cycle to separate temperature drift from product buildup.
What is the first thing to check when a part sticks in one corner?
Check the release film in that corner and the mold temperature at that corner. A focused spray cone often underapplies the corner while overapplying the center. If the corner remains stuck after film correction, inspect the corner for mold surface damage or a vent restriction.
References
[1] Oertel, G., ed. Polyurethane Handbook: Chemistry – Raw Materials – Processing – Application – Properties. 2nd ed. Munich: Hanser Publishers.
[2] Szycher, M. Szycher’s Handbook of Polyurethanes. 2nd ed. Boca Raton, FL: CRC Press.
If you’re interested, check out these related articles:
The Role Of Rise Time In Polyurethane Foaming
Measuring Polyurethane Foam Resilience A Practical Test Guide
How To Calculate Shot Weight In Polyurethane